Setting up your domain on Plurilock AI
Organizational Unit
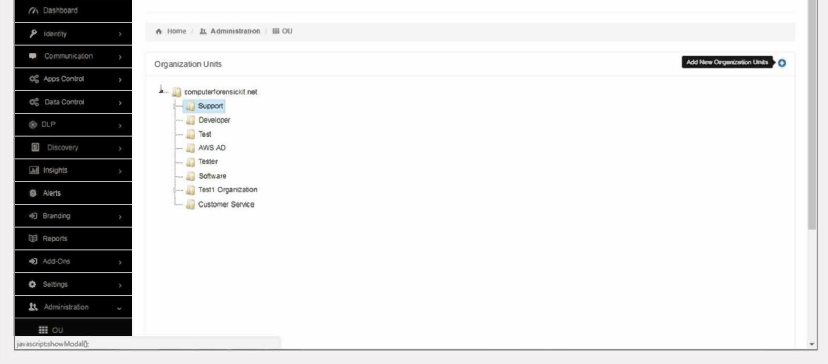
To create an OU (Organizational Unit), go to Plurilock AI Dashboard ➔ Administration ➔ OU
- The admin can add, update, or delete the organizational units by double clicking on any OU
- With the help of the OU, the admin can create groups according to the departments present in te organization
- OUs allow the admin to add users to the particular unit they belong to
Note: In Google Workspace, the OU structure will be synced from Google Workspace admin console.
Users
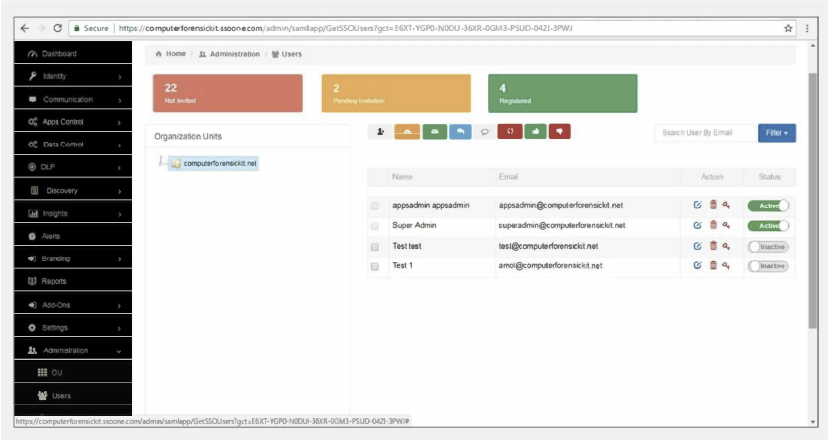
To create users, go to Plurilock AI Dashboard ➔ Administration ➔ User
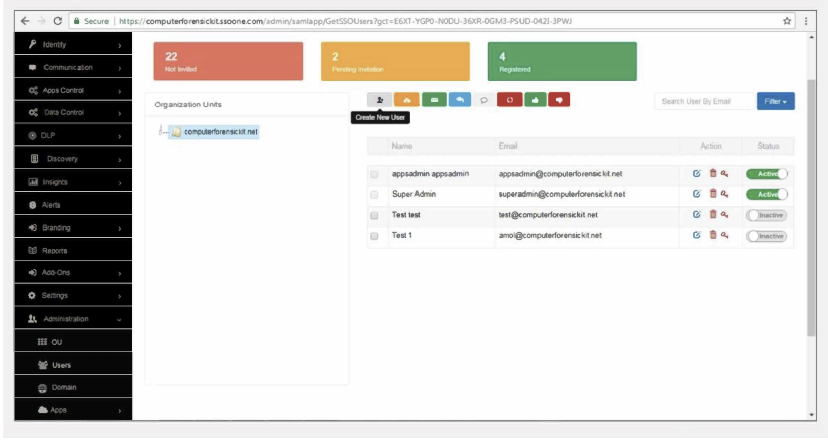
- To create individual users in Plurilock AI, click on the Add User button
- To create users, the admin must fill in the details of the user.
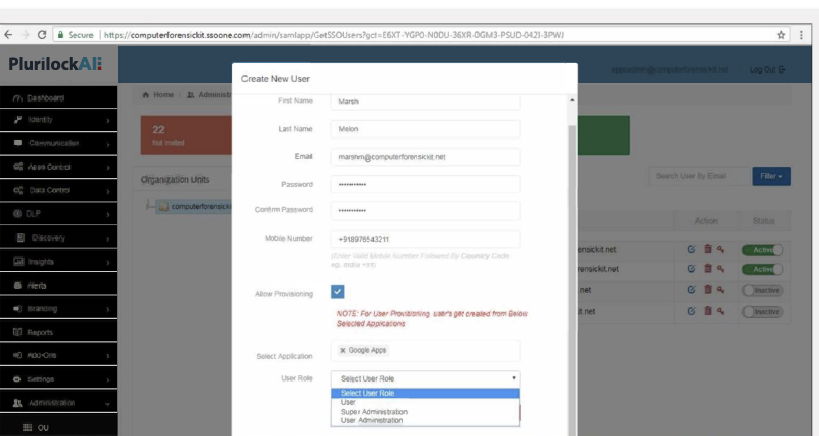
Allow Provisioning means the user will be created in selected application with the uploaded data.
User Role: The three user roles are User, Super Administrator, and User Administrator
- User is “End User” without admin rights
- Super Administrator is an admin who possesses all admin rights
- User Administrator is an admin with the particular admin rights provided by Super Admin
Editing the user details, resetting password and deleting users can be done by the admin from the right panel action field
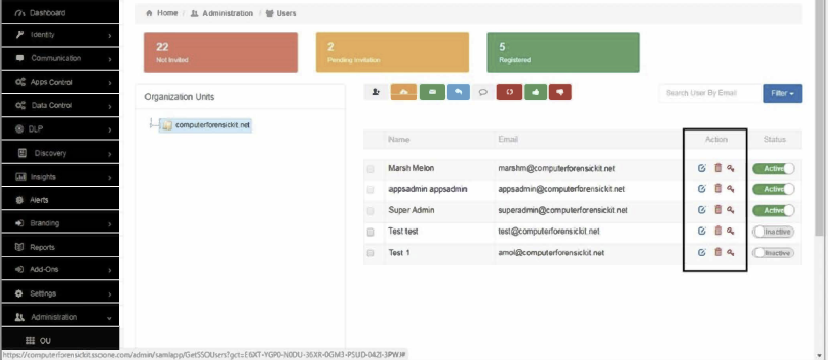
To create a user through CSV, click on Button “Import user CSV”
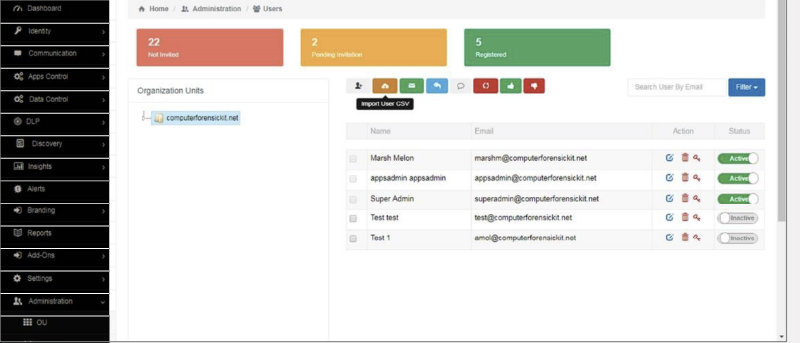
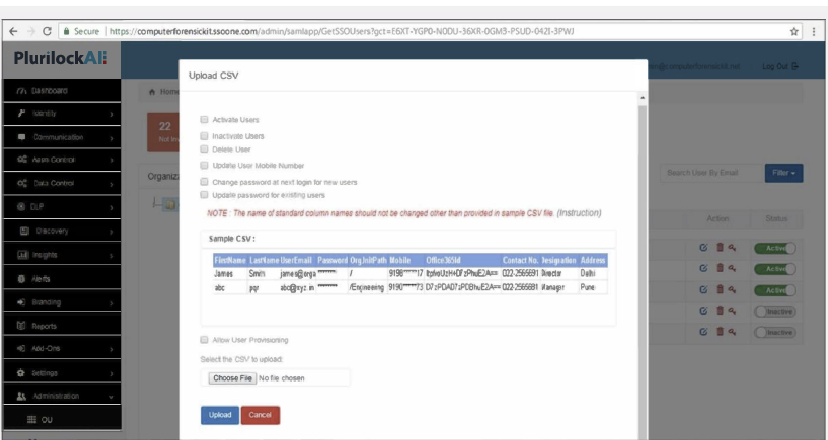
To upload a CSV, the admin can create or edit the CSV file with user information and upload the File
The admin can take multiple actions such as:
- delete users
- activate or deactivate users
- update mobile numbers
- change password
update password for existing users
The “Allow User Provisioning” which can be accessed by admins, allows them to perform an action in selected Applications and Plurilock AI
- Select the CSV file from your system.
- Admins can download sample CSV & headers of CSV file that must be same as the sample CSV
- Click “Upload” to upload the CSV file to Plurilock AI Console
- User information will be saved and updated in Plurilock AI Console
Domain
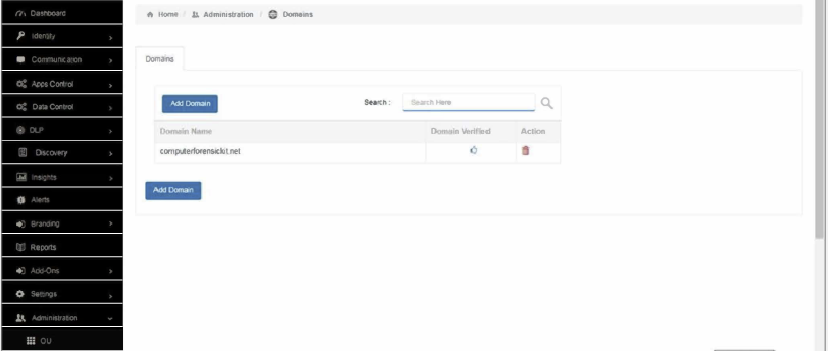
To add new domain go to Plurilock AI Dashboard ➔ Administration ➔ Domain
The admin can add multiple domains in Plurilock AI from this area, for example, the organization has two cloud application domains for different purposes, like for Google Workspace and Dropbox,
- Here the admin can configure both domains for the Plurilock AI Console
- Verify the domains at the time of adding to Plurilock AI Console
Apps
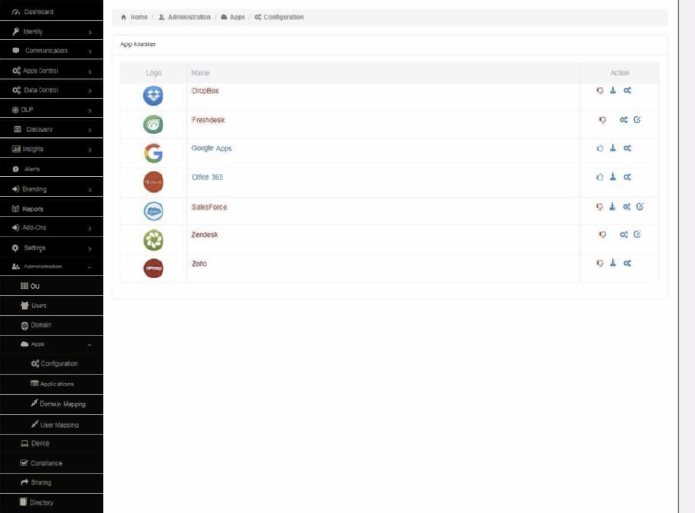
To add Apps, go to Plurilock AI Dashboard ➔ Administration ➔ Apps
In Apps, it’s mandatory for the admin to configure applications (e.g. Microsoft 365, Dropbox, Zoho, Salesforce, etc.) on Plurilock AI Console.
In Apps, Admins have access to:
- Configuration: used for configuring cloud-based applications to Plurilock AI Console.
- The admin must enable each cloud-based application
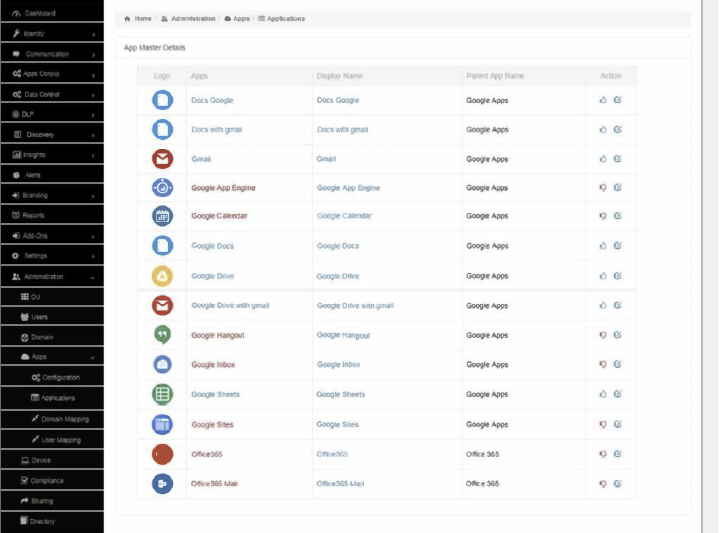
Application: Here the admin can enable and disable the applications and child applications of the respective applications that are listed.
The admin can use the action buttons to enable, disable or, edit the applications on the fly.
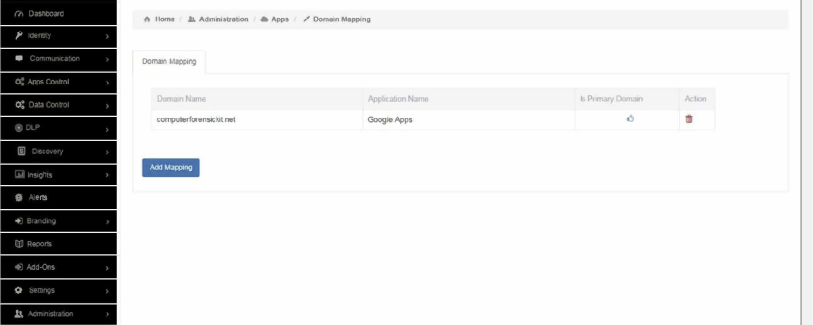
Domain Mapping: Here the admin needs to map domains for particular applications.
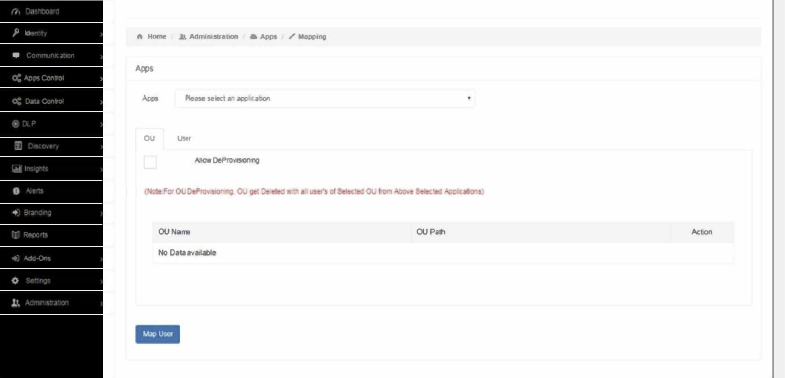
- User iMapping: The admin must map Plurilock AI ID to the respective application ID.
- User mapping can be done either as user-based or OU-based.
- To ensure the succcess of OU mapping, the Plurilock AI ID and the application ID must be the same.
Devices
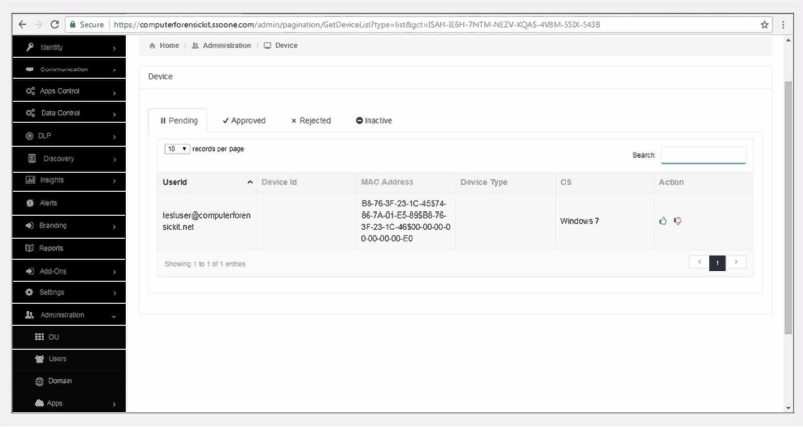
The devices section provides administrators with a wide view of laptop, desktop, and mobile devices used by the users in the organization.
This includes:
Pending
- In this section, the admin can view requests received from users.
- The admin can also approve or reject the device request with the help of action buttons
Approved
- In this section, the admin can view the approved devices.
- From here, the admin can add the device by clicking on the ADD DEVICES button.
- If admin has the mac address of the user’s machine, the admin maps that mac address with user ID with the help of the ADD DEVICE button
- In the approved tab, users can also add the devices in bulk through IMPORT DEVICES in CSV format for mobile and desktop devices.
Rejected
The admin can view all rejected devices.
Inactive
The admin can view all inactive devices
Compliance
This is a part of Data Loss Protection (DLP), where the admin can define security categories
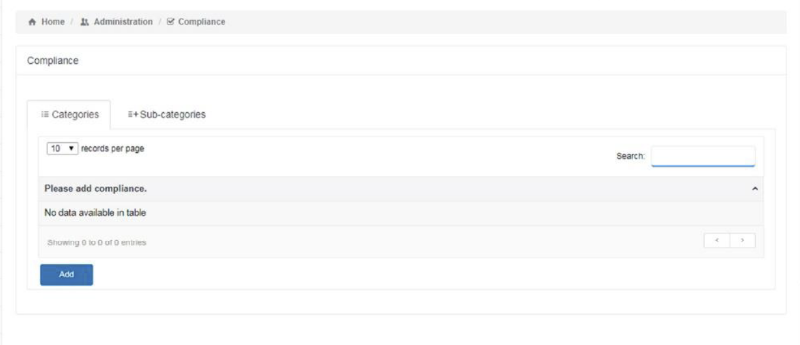
The admin can add security compliance - PHI, HIPAA, PII, or PCI categories internally depending on complexity implemented with the organization domain.
Including categories, the admin can add the subcategories to increase the network security level for the company.
If required, the admin can define their own company compliance category including sub category.
*Go to Administration ➔ Compliance ➔ Click Add ➔ Click on ‘+’ icon to define your own compliance * 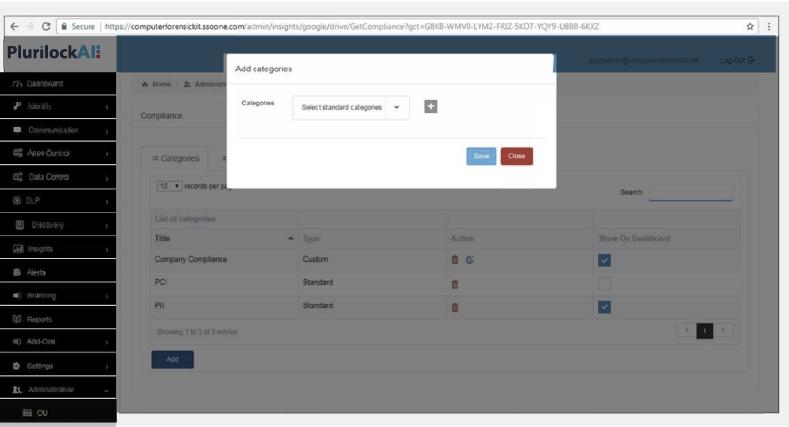
Sharing
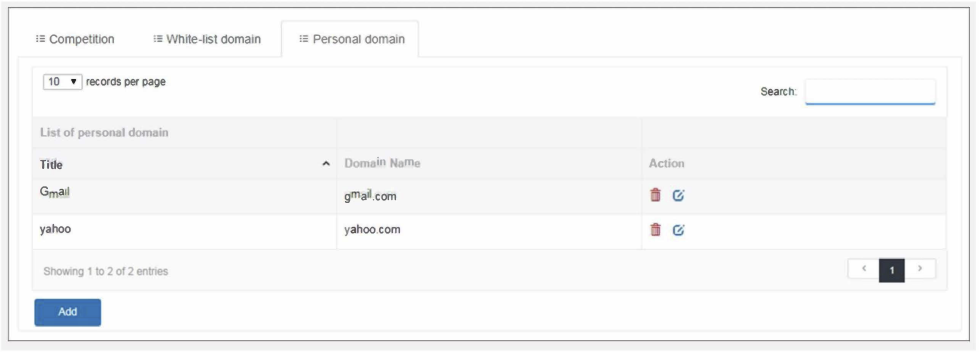
The admin should define 3 sharing rules - competition domain, whitelist domain, and personal domain
- Competition Domain The admin can define the competitor’s domain
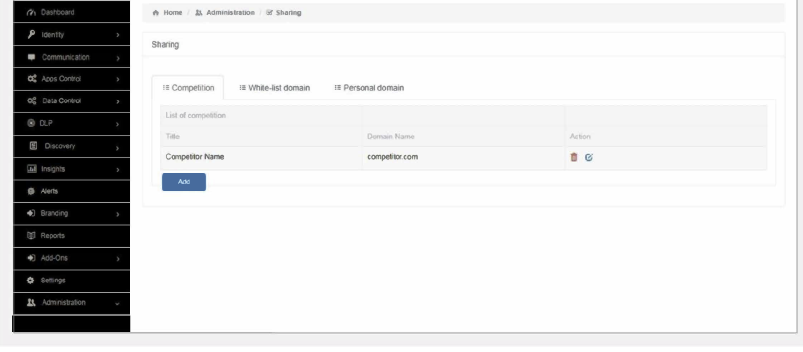
- White-list Domain The admin can define the domain name to share data across
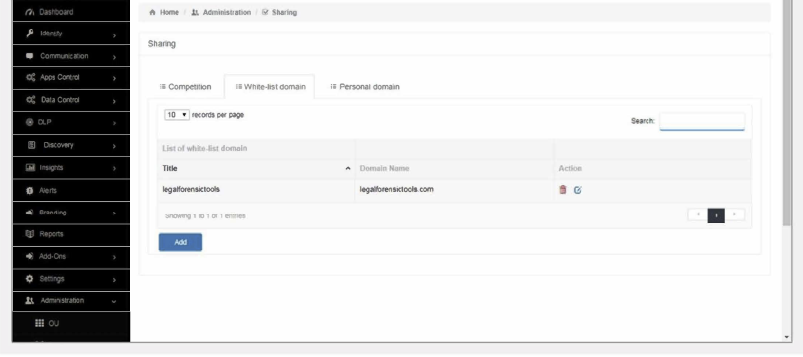
- Personal Domain The admin can define the personal domain name like as Gmail, Yahoo etc.
Directory
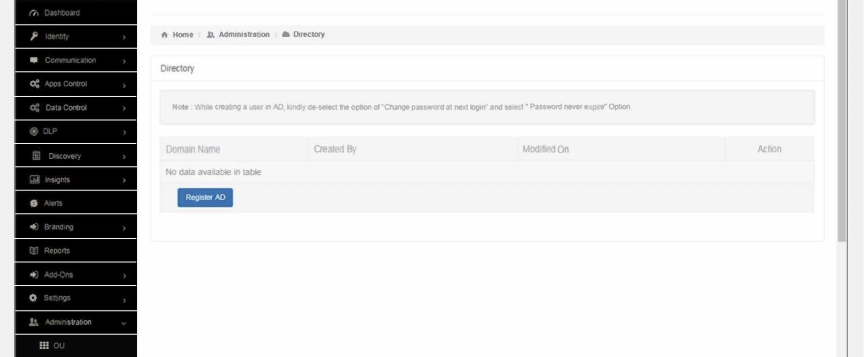
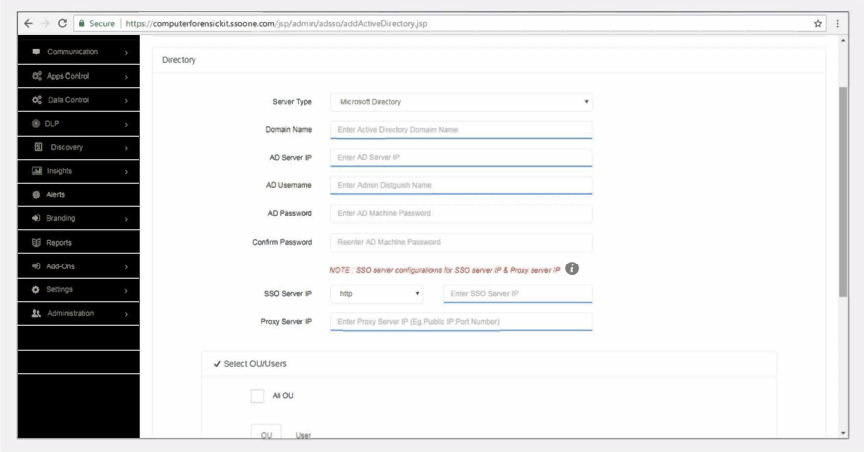
The admin can integrate Microsoft Active Directory with Plurilock AI. With the help of this policy, the users will authenticate with AD password to login to Plurilock AI. In this case, the company’s Active Directory will become the Identity Provider
- To register the AD with Plurilock AI, click ➔ Register AD
- Fill in the server details. This policy can be applied either on OU-based or user-based
Note: To integrate Active Directory with Plurilock AI, contact our support team at support@plurilock.com
Was this article helpful?
That’s Great!
Thank you for your feedback
Sorry! We couldn't be helpful
Thank you for your feedback
Feedback sent
We appreciate your effort and will try to fix the article